Finding fun and easy crafts for kids to enjoy at home can be a game-changer in unlocking their creativity and providing valuable developmental benefits. Crafting is not just an entertaining way to pass time but also a crucial activity that supports learning and skill-building. From honing fine motor skills to fostering imagination and problem-solving abilities, the impact of engaging kids in craft projects is profound.
Starting with crafts can sometimes feel overwhelming, but it doesn’t have to be. This guide is designed to simplify the process, featuring 40 fun and easy crafts for kids that are perfect for kids to do at home. Whether the goal is to have a fun family afternoon or to introduce a structured creative learning session, these craft ideas for kdis are accessible, requiring minimal materials and preparation. Let’s dive into why crafting with kids is beneficial and explore how to kickstart your crafting journey with ease and confidence.
Why Craft with Kids?
Crafting with kids is more than just a way to pass the time. It offers numerous benefits that contribute to a child’s development and well-being. Here’s why it’s a great idea:
- Boosts Creativity: Engaging in crafts stimulates imagination, allowing kids to explore ideas and express themselves uniquely.
- Enhances Fine Motor Skills: Activities like cutting, gluing, and assembling improve hand-eye coordination and dexterity, crucial for writing and other daily tasks.
- Promotes Problem-Solving: Crafting presents challenges to overcome, such as figuring out how pieces fit together, teaching kids to think critically and find solutions.
- Encourages Bonding: Crafting together fosters quality family time and teamwork, making lasting memories and strengthening relationships.
- Builds Confidence: Completing a craft project gives kids a sense of achievement and boosts their self-esteem.
- Teaches Patience: Many crafts require waiting – for paint to dry or glue to set, teaching kids the value of patience and delayed gratification.
- Educational Value: Crafts can be tied to educational themes, such as science projects or history, making learning fun and interactive.
- Stress Relief: Crafting is a calming activity that can help children relax and manage feelings of anxiety.
By incorporating crafting into your routine, you’re not only providing entertainment but also supporting important aspects of your child’s development. It’s a fun, affordable, and rewarding way to spend time together, making it a worthwhile activity for families.
How to Get Started with Easy Crafts for Kids
Getting started with crafts for kids is an exciting journey that sparks creativity, enhances fine motor skills, and offers a wonderful opportunity for bonding. Whether you’re a parent, guardian, or educator, engaging children in crafting activities can be both fun and rewarding. Here’s a simple guide to help you begin this creative adventure.
Choose the Right Project
Identify Interests: Start by considering the interests and age of the child. Younger kids might enjoy simple projects like tissue paper flowers or coffee filter butterflies, while older children may be intrigued by more complex crafts like a homemade kaleidoscope or a cardboard box marble run.
Keep it Simple: Select projects that require minimal materials and preparation to ensure a stress-free crafting experience. It’s always a good idea to begin with something straightforward to build confidence.
Gather Your Materials
Basic Supplies: Most crafts for kids can be done with items you likely already have at home. Common supplies include construction paper, glue, scissors, markers, and recycled materials like toilet paper rolls and cardboard boxes.
Safety First: Ensure all materials are safe for children to use. Opt for child-safe scissors and non-toxic glue and paints. Always supervise activities, especially those involving small items or tools.
Set Up a Crafting Area
Make a Dedicated Space: Choose a spot that’s easy to clean and spacious enough for your crafting activities. Covering the surface with newspapers or a washable tablecloth can protect against spills and stains.
Organize Supplies: Keeping your materials organized can make the crafting experience more enjoyable for both you and the child. Use containers or ziplock bags to store small items like beads or googly eyes.
Dive into Crafting
Follow Instructions: If you’re using an online guide or a book, read through the instructions first. Understand the steps before explaining them to the child, breaking down complex instructions into manageable parts if necessary.
Encourage Creativity: Allow children to express themselves through their crafts. It’s okay if the final product doesn’t look exactly like the example. The goal is to have fun and let creativity flow.
Cleanup and Display
Make Cleanup Fun: Involve kids in the cleanup process by making it part of the activity. Singing songs or making a game out of it can help turn what might seem like a chore into an enjoyable part of the crafting experience.
Display the Artwork: Showcasing the completed crafts can boost a child’s self-esteem and encourage them to engage in more creative activities. Whether it’s hanging a paper craft on the fridge or using a homemade bookmark, let their work be seen and appreciated.
Crafting with kids doesn’t have to be complicated or expensive. With a little preparation and imagination, you can make memorable moments and beautiful projects. Remember, the focus is on the process, not just the final product. Enjoy the journey of creativity and bonding that crafting brings.
FAQs on Easy Crafts for Kids
Crafting with kids is not only fun but also enhances their creativity and fine motor skills. Below are answers to some commonly asked questions to help you get started on this delightful journey.
What are the easiest crafts to do with kids?
The easiest crafts for kids usually require minimal materials and preparation. Some popular options include:
- Tissue Paper Flower Rainbow Craft
- Coffee Filter Butterflies
- Fairy House Craft using recycled materials
- Ice Cream Craft with free templates
- Paper Plate Turtles
What materials do I need for simple kids’ crafts?
For most simple crafts, you’ll need basic supplies like:
- Construction paper or cardstock
- Glue or glue sticks
- Scissors (child-safe)
- Markers, crayons, or paint
- Recycled materials (toilet paper rolls, milk cartons)
- Basic crafting items like pipe cleaners, googly eyes, and popsicle sticks
How can I make crafts educational for kids?
To make crafts educational, consider incorporating themes or concepts that your child is learning about. For example:
- Science: Make a homemade kaleidoscope to learn about light and colors.
- History: Craft ancient Egyptian collars while learning about Egypt.
- Math: Build a cardboard marble run and discuss physics and angles.
How do I organize a crafting session for kids?
Organizing a crafting session can be easy and fun:
- Choose the craft in advance and ensure you have all necessary materials.
- Set up a crafting area that’s easy to clean, like a covered table or outdoors.
- Explain the steps clearly, offering help as needed but encouraging independence.
- Keep safety in mind, especially with scissors or glue guns.
How can I keep crafting affordable?
To keep crafting affordable, consider these tips:
- Use recycled materials like cardboard boxes, toilet paper rolls, and milk cartons.
- Buy crafting supplies in bulk or on sale.
- Share materials with friends or family members.
- Utilize free printables and templates available online.
How can crafts help with a child’s development?
Crafts can significantly benefit a child’s development by:
- Enhancing fine motor skills through cutting, gluing, and coloring.
- Boosting creativity and imagination as they make something unique.
- Teaching problem-solving skills when figuring out how to assemble parts.
- Promoting patience and focus, especially for crafts that take time to complete.
Can crafting be a bonding activity?
Absolutely! Crafting together can be a wonderful way for families to spend quality time together, fostering teamwork and making lasting memories. It encourages communication, shared laughter, and the joy of making something together.
How do I manage the mess during craft time?
Managing the mess can be part of the fun, but here are some tips to keep it under control:
- Cover surfaces with newspapers or a washable cloth.
- Keep wipes or a damp cloth handy for quick cleanups.
- Use washable paints and markers.
- Designate a specific area for crafting where a little mess is okay.
Crafting with kids is an enriching activity that offers endless benefits and opportunities for learning, bonding, and fun. With the right approach, it can be a delightful experience for both children and adults.
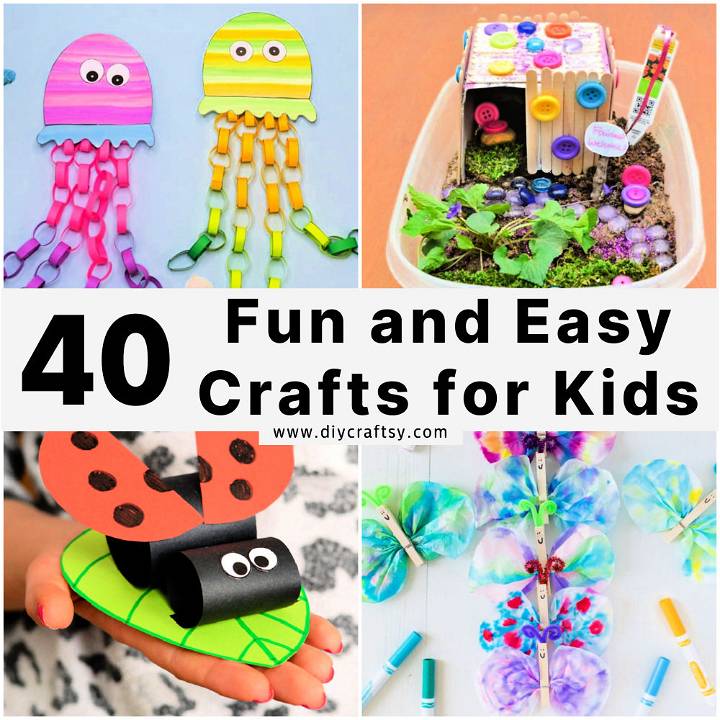
40 Fun and Easy Crafts for Kids (Craft Ideas to Do at Home)
Discover 40 fun and easy craft ideas for kids to enjoy at home. Get creative with these simple projects that will keep your little ones entertained for hours!
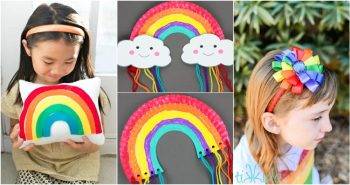
1. Fun Tissue Paper Flower Rainbow Craft for Kids
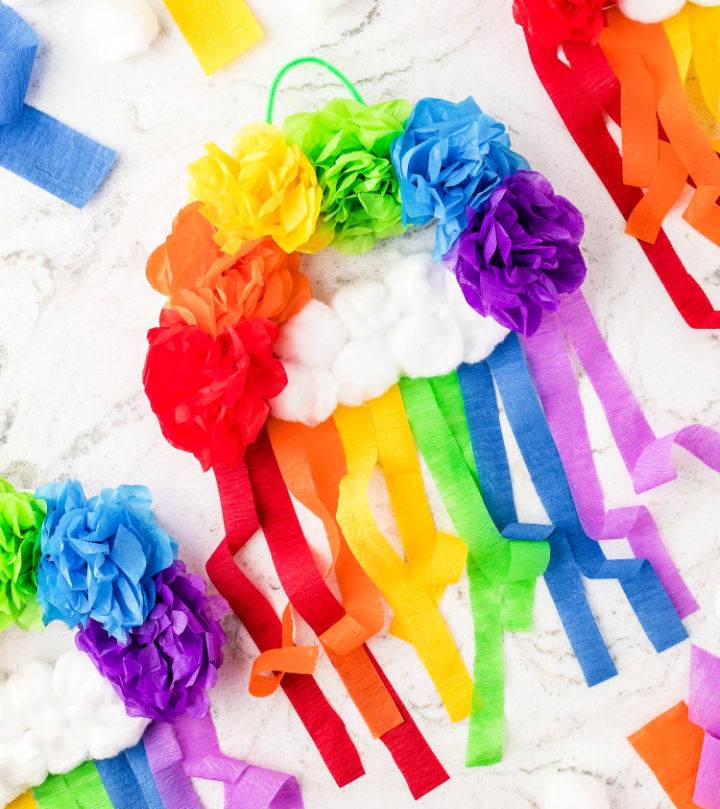
Dive into crafting fun with the Tissue Paper Flower Rainbow Craft on Kids Activity Zone. Perfect for engaging little hands, this craft tutorial breaks down each step, making it wonderfully simple to make a colorful rainbow adorned with tissue paper flowers.
It’s an ideal project for kids who enjoy cutting, stapling, and gluing, introducing them to the joy of making something beautiful. Although younger children might need a bit of help, everyone will love adding their personal touch to this cheerful decoration. Gather your craft supplies and enjoy crafting this vibrant rainbow today!
2. Simple Coffee Filter Butterflies
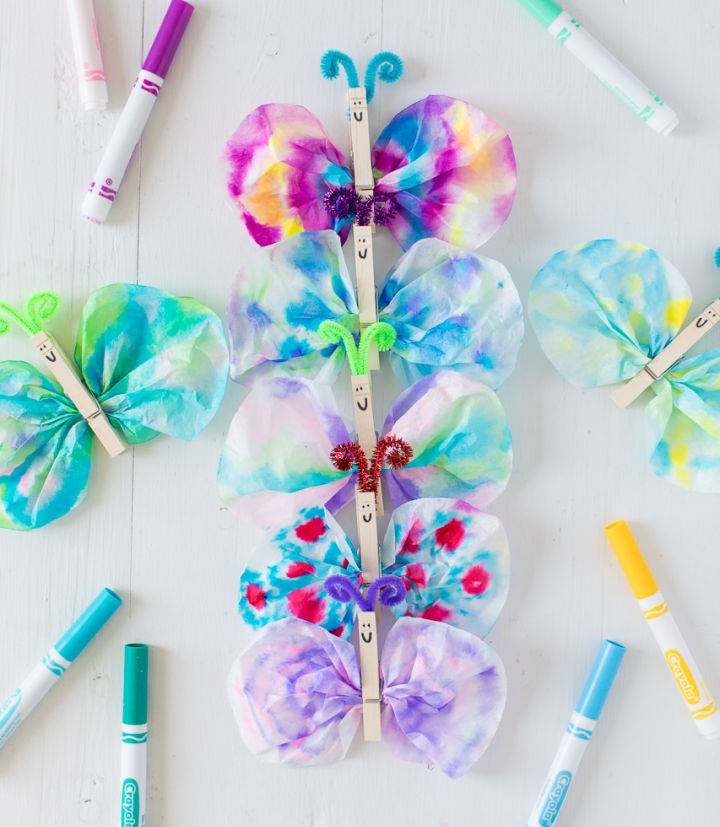
Unlock the magic of crafting with your kids this summer with Coffee Filter Butterflies. It’s a vibrant, easy-to-make project needing just water, washable markers, and coffee filters. Perfect for those seeking a mess-free activity, these butterflies can adorn flower bouquets, make whimsical buntings, or just add a splash of color around the home. Gather simple supplies like clothespins and colorful pipe cleaners, and in less than 30 minutes, including dry time, you’ll have beautiful, handmade butterflies ready to brighten your day. Ideal for creative family bonding!
3. Make a Fairy House Craft for 5 Year Old’s
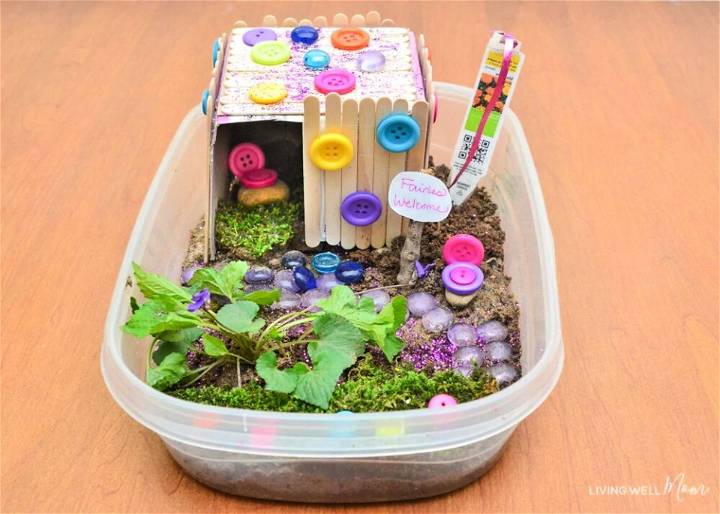
Unleash your child’s creativity with a magical DIY fairy house project! Perfect for tiny hands and big imaginations, this craft encourages kids to explore their creative side while developing fine motor skills. Use everyday materials like craft sticks, colorful buttons, and recycled containers to build a whimsical home that’s perfect for fairy guests. It’s an ideal activity for spending quality time together and making the most of those craft supplies gathering dust. Ready to make enchanted memories? Dive into the detailed guide at Living Well Mom and start crafting today!
4. Free Printable Ice Cream Template
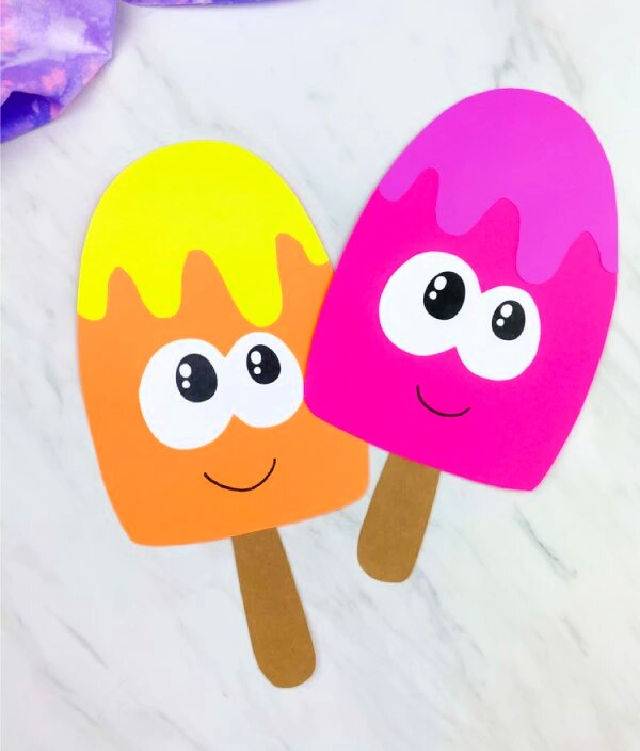
Unlock endless creativity with crafts for kids that turn imagination into reality. Dive into a fun summer activity with an easy-to-follow ice cream craft perfect for kids! Ideal for toddlers, preschoolers, and kindergarteners, it only requires basic supplies like colored paper, a black marker, glue, and scissors. Plus, a free template is available to simplify the process.
This craft not only fosters creativity but is also an excellent way for children to improve their fine motor skills. It’s a delightful project for home, daycare, or classroom settings. For full instructions and more engaging summer craft ideas, visit Simple Everyday Mom.
5. Very Easy Kaleidoscope Using Cardboard Tube
Spark creativity and fun with this simple Easy DIY Kaleidoscope for Kids. Gather common household items for an exciting project. Perfect for a cozy day inside, this activity not only delights but also educates. Dive into crafting a homemade kaleidoscope.
The process is straightforward, with results that dazzle. Rediscover the joy of vivid patterns and colors. Ideal for family bonding, this DIY promises memorable moments. Plus, it’s a fantastic way to encourage creativity and explore science basics. Start making those magical kaleidoscope views today!
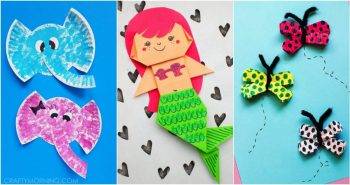
6. Tissue Paper and Paper Plate Turtle Craft
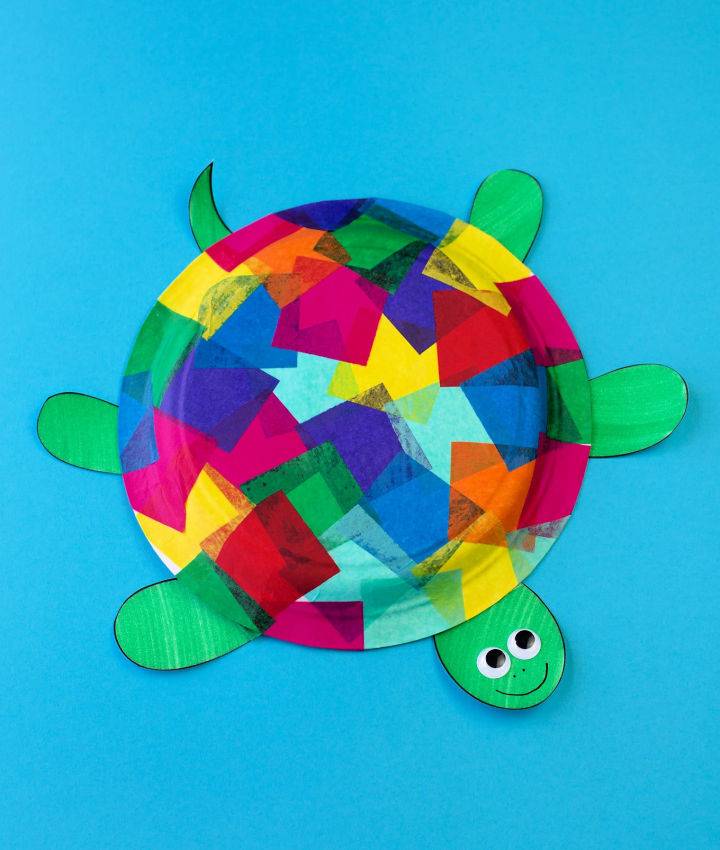
Dive into a world of creativity and fun with a tissue paper and paper plate turtle craft! Perfect for engaging little ones, this craft is easy to follow and brings colorful joy to any setting. It comes with a helpful free printable template, ideal for crafting sessions at home, in the classroom, or during summer camp activities. Transform simple materials into a vibrant craft that not only entertains but also educates about the fascinating life of turtles. For detailed instructions and more, visit Fireflies and Mudpies.
7. Cardboard Box Into Epic Marble Run
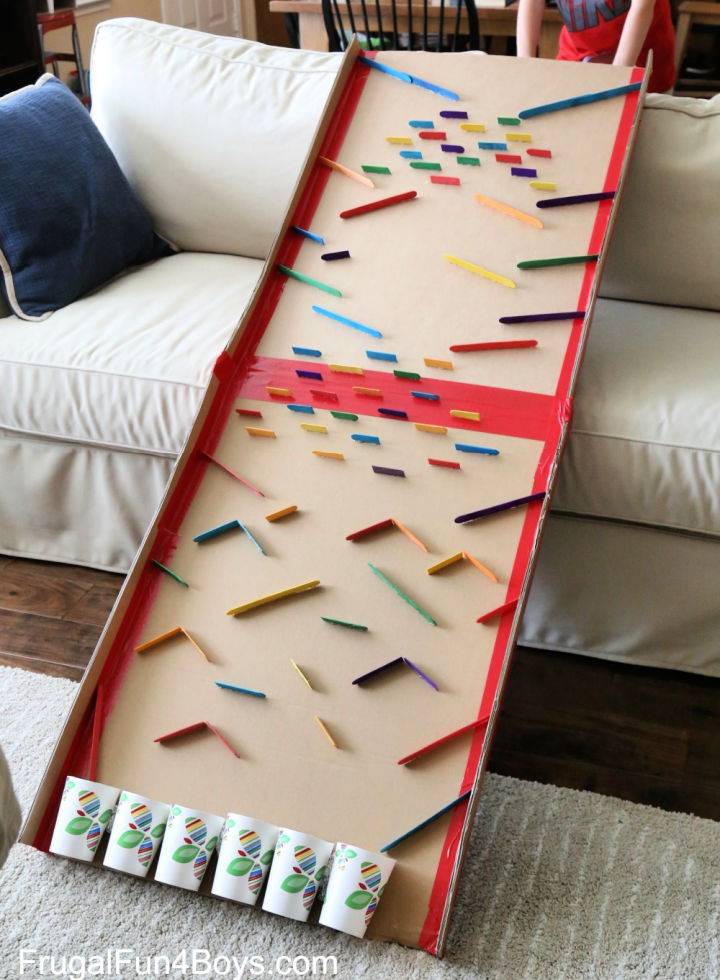
Elevate your craft game by transforming a simple cardboard box into a thrilling marble run adventure! With household items like craft sticks, hot glue, and paper cups, kids can dive into an engaging engineering challenge. It’s a creative endeavor that questions the physics of motion — where will the marbles land?
Designed by Aidan and a hit among younger enthusiasts, this project encourages teamwork and inventive thinking, minus any digital distractions. Curious how it all comes together? Find the step-by-step guide and more inventive ideas at Frugal Fun For Boys and Girls. Safe fun is key, so remember, marbles are not for mouths!
8. How to Make Your Own Paper Fish
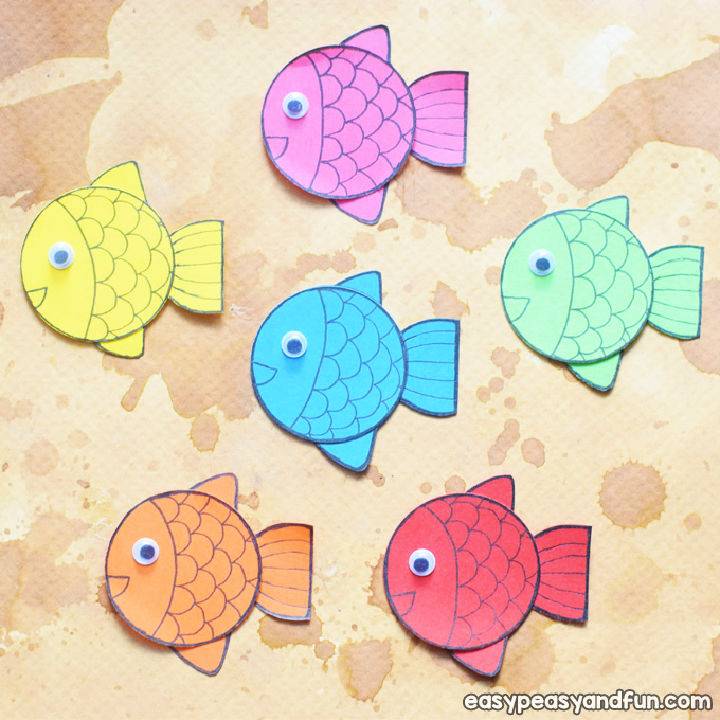
For a fun, quick, and engaging craft perfect for summer, dive into making simple paper fish. Ideal for kids, this craft is incredibly easy to make, requiring only a few materials like colored paper, googly eyes, and a circle puncher.
These charming little paper fish are not only adorable but also offer endless creativity, allowing you to make a vibrant school of fish in no time. Follow the step-by-step instructions and enjoy a crafting experience that promises fun and creativity rolled into one. Perfect for crafting enthusiasts of all ages, start making your colorful aquatic friends today!
9. Confetti Bookmark Craft for Students
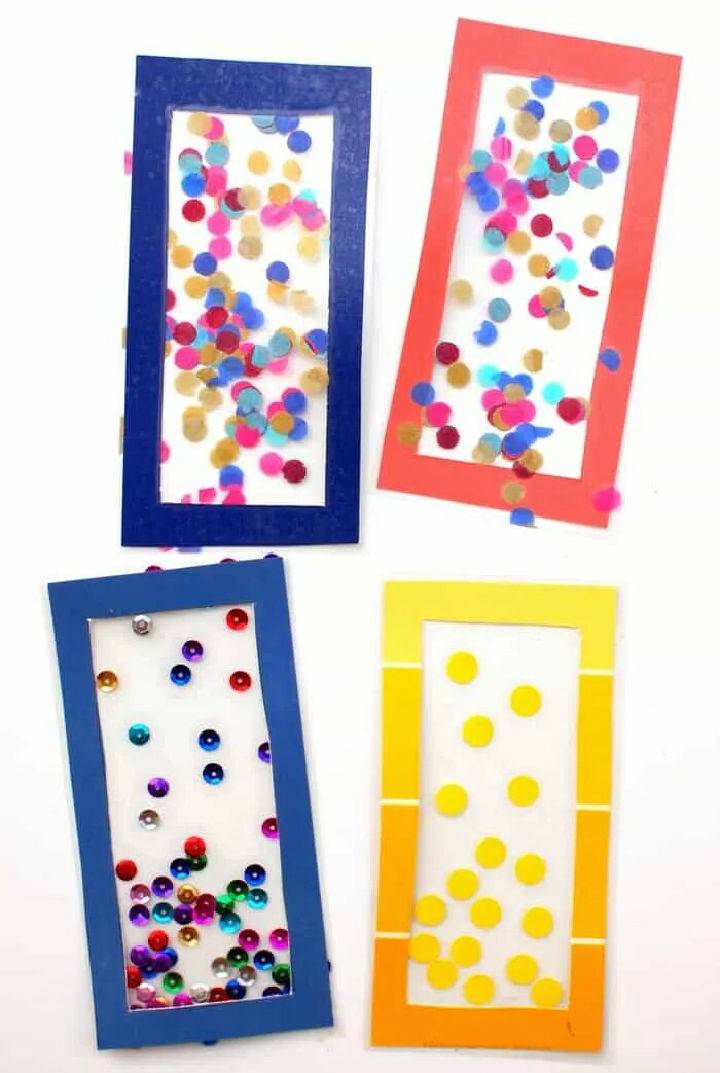
Dive into a colorful crafting adventure with DIY Candy’s guide to making DIY confetti bookmarks perfect for kids. This engaging project is tailored for crafters of all ages, requiring no prior skills. With everyday materials like cardstock, tissue paper, and clear contact paper, you’ll craft a delightful accessory for your reading adventures.
Ideal for parents and children to enjoy together, this easy and fun activity not only fuels creativity but also marks a vibrant start to the school year. Get ready for a crafting session that promises to sprinkle a little joy into your reading routine!
10. Good Monster Windsock With Cardstock Paper
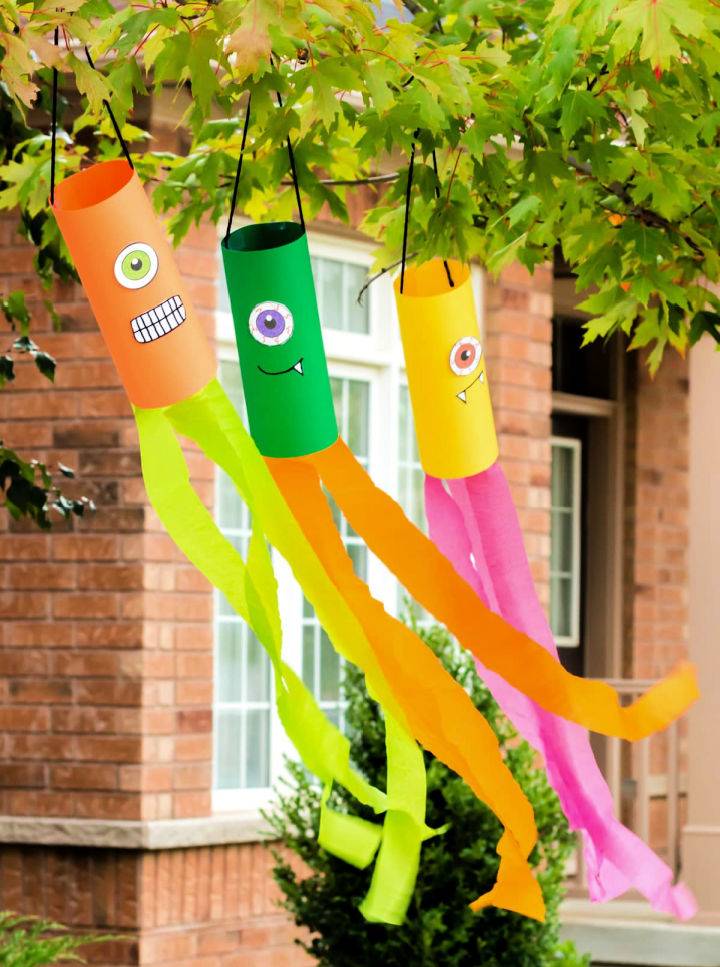
Unleash the joy of crafting with your kids by making adorable Monster Windsocks. Perfect for a playful decoration any time of year, this project is simple, inexpensive, and sure to spark creativity. Suitable for children aged 4 and up, it requires minimal mess and offers a medium difficulty level, making it a wonderful group activity. All you need is cardstock, crepe paper streamers, and basic crafting supplies to bring these cute monsters to life in less than 10 minutes. Hang your creations to catch the breeze and watch the smiles unfold!
11. Recycled Cardboard Sun Crafts for 5th Grader
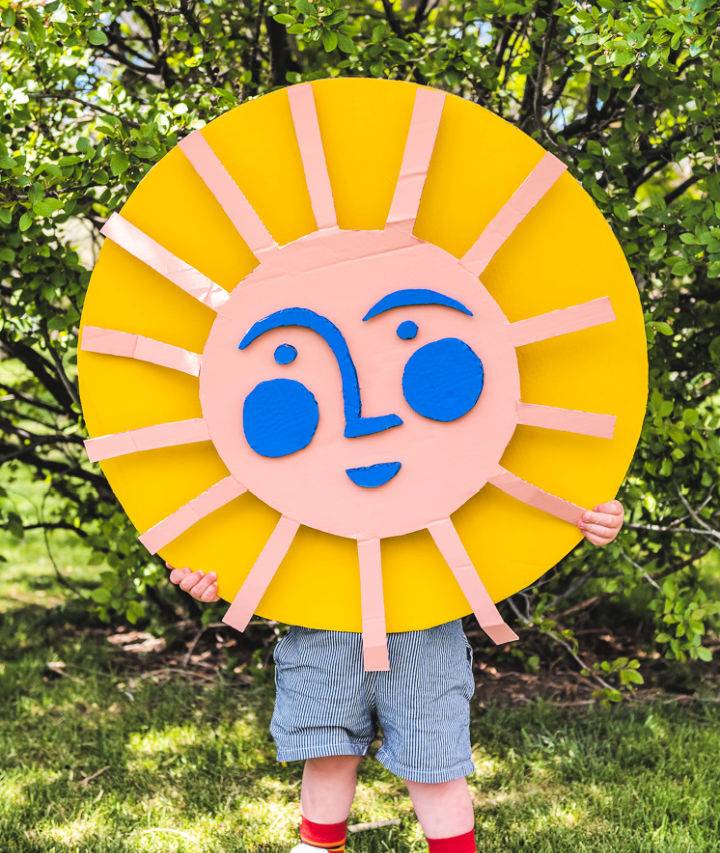
Get hands-on with DIY crafts that inspire innovation and self-expression in all ages. Celebrate Earth Day with a burst of creativity by making a recycled cardboard sun! Inspired by Alexander Girard’s famous designs, this craft is perfect for adding a little sunshine to your home while teaching kids about recycling and creativity.
All you need are some cardboard boxes (which many of us have plenty of these days), the provided template, and some basic craft supplies. Ideal for an easy and meaningful Earth Day project, this eco-friendly craft not only brightens your space but also offers a valuable lesson in sustainability. Ready to spread some sunshine? Find the full instructions and template at The House That Lars Built.
12. Paper Bag Kite Project for Kids
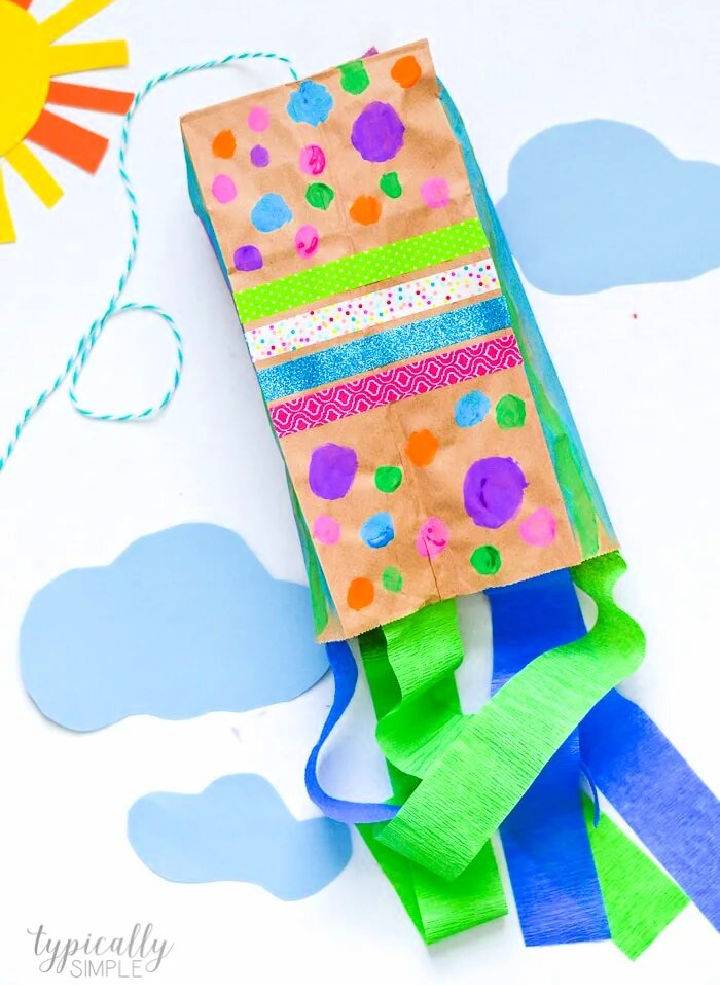
Spring invites creativity and outdoor fun, making it the perfect season for flying kites. Why not engage in crafting your own this season with a simple and enjoyable paper bag kite craft? This project is fantastic for keeping kids entertained, especially when they’re eager to enjoy the warmer weather.
Gather basic craft supplies like paper lunch bags, yarn, popsicle sticks, and whatever you have for decoration like markers or stickers. Follow easy steps to make a unique kite, encouraging children to tap into their creativity. It’s an eco-friendly, cost-effective way to enjoy spring winds!
13. Cool Construction Paper Ladybug on a Leaf
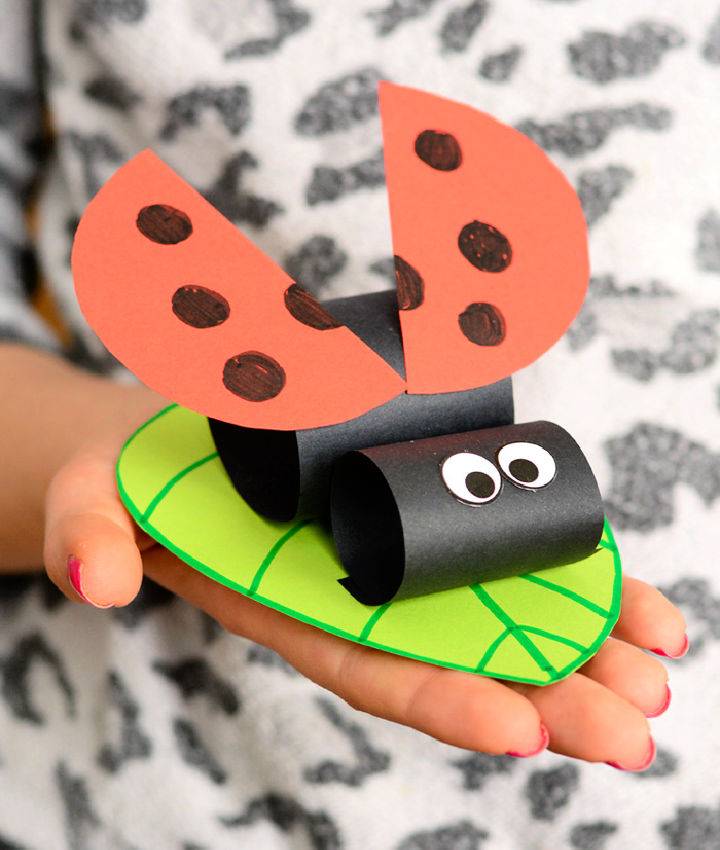
Dive into a creative adventure with our easy-to-follow Construction Paper Ladybug on a Leaf tutorial. Ideal for sparking imagination in kids during the spring season, this craft guides you through making an adorable ladybug using simple materials like construction paper, glue, and markers.
Suitable for older children to craft independently and a fun project for teachers to enhance classroom decorations. Embrace the joys of crafting and make a charming ladybug on a leaf that’s perfect for display. Get ready to cut, glue, and decorate your way to a cute paper creation!
14. Easy Paper Jellyfish Craft for Kindergarteners
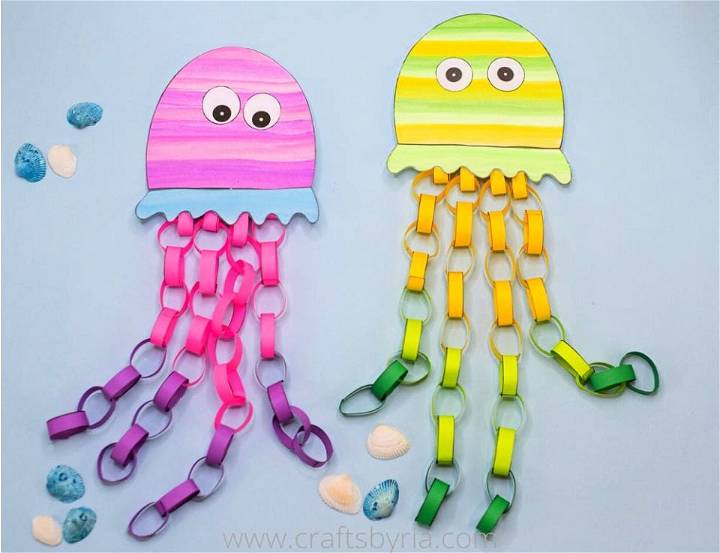
Spark joy with engaging craft ideas for kids, perfect for fostering artistic talents. Unleash your kids’ creativity this summer with a simple yet enchanting paper jellyfish craft. Ideal for preschoolers to school-age children, it’s a fantastic way to dive into under-the-sea themes and enhance fine motor skills through cutting and gluing.
Not just an art project, the colorful paper chain tentacles offer a whimsical touch, and with an added loop of yarn, they transform into a delightful hanging decoration. Perfect for adding to your summer camp crafts collection, it promises a sea of fun for little ones. Follow the easy steps and make a charming jellyfish craft that’s sure to brighten any room.
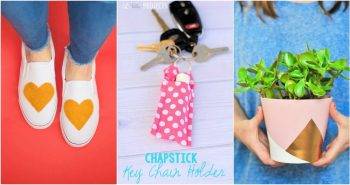
15. Best Backpack Charm Using Duck Tape
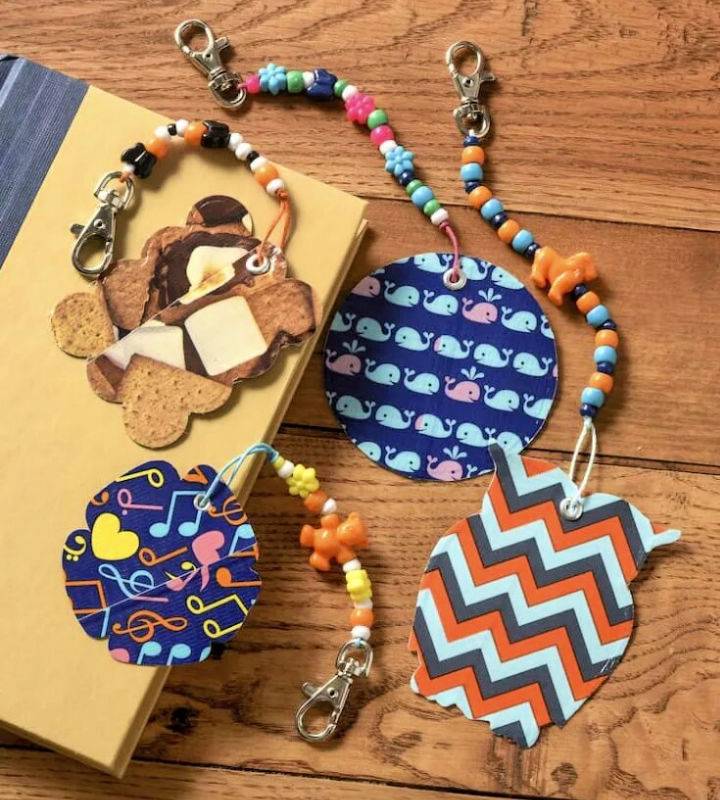
Elevate your back-to-school gear with personalized DIY backpack charms! Dive into a world of creativity using Duck Tape in your preferred patterns and colors. This simple project is perfect for crafters of all ages, transforming ordinary school bags into unique expressions of style in minutes.
With no special skills required, you’ll enjoy mixing and matching tape designs, threading beads, and showcasing your personal flair. For detailed instructions and more crafty inspiration, visit Mod Podge Rocks. This fun, mess-free activity is an ideal way to kick off the school year with a touch of handmade charm!
16. Unicorn Toilet Paper Roll for 7 Year Old’s

Dive into a magical crafting adventure with this delightful Unicorn Toilet Paper Roll Craft. Perfect for summer days, it’s an easy and cute project that your kids will adore. With simple supplies like construction paper, curling ribbon, and a bit of glitter, turn everyday items into a whimsical unicorn.
Even if you’re missing some materials, this guide offers creative alternatives. Engage your children’s creativity and spend quality time making something magical together. Ideal for parties or a tech-free afternoon, this unicorn craft is a must-try for fun-loving families.
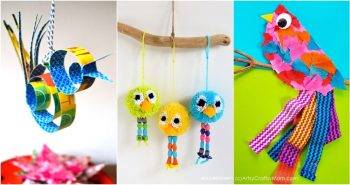
17. Recycled Milk Carton Birdhouse
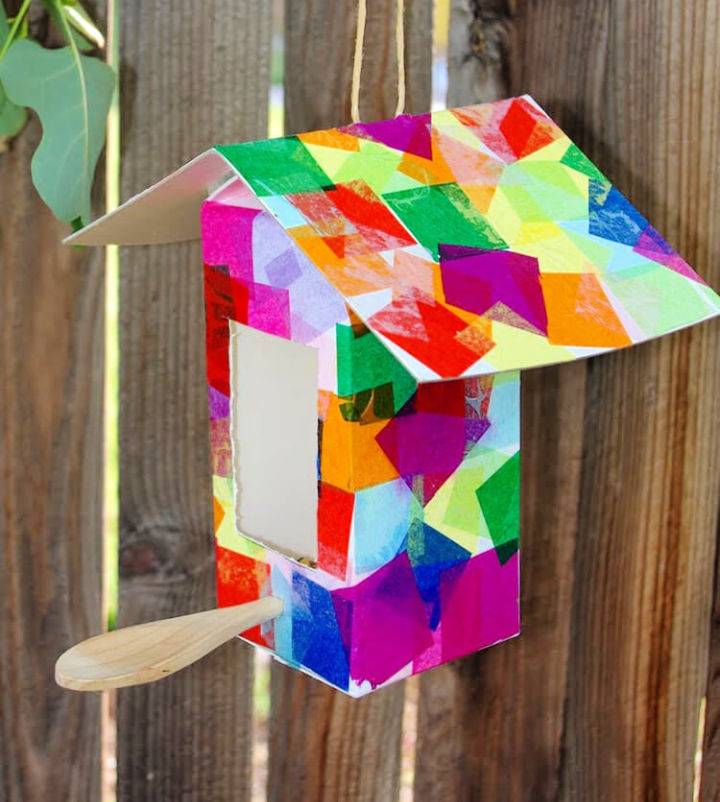
Transform a simple milk carton into a whimsical birdhouse or bird feeder with this delightful kids’ craft from Happiness is Homemade. Perfect for engaging children of all ages, this eco-friendly project encourages creativity and offers a fantastic opportunity to repurpose household items.
The tutorial provides clear, step-by-step instructions, making it easy for kids to follow along. They’ll learn not only about crafting but also about caring for nature as they watch birds visit their handmade creations. Get ready to dive into your recycling bin and spark joy in your feathered friends with these colorful, homemade birdhouses and feeders.
18. How to Make a Catapult With Popsicle Sticks
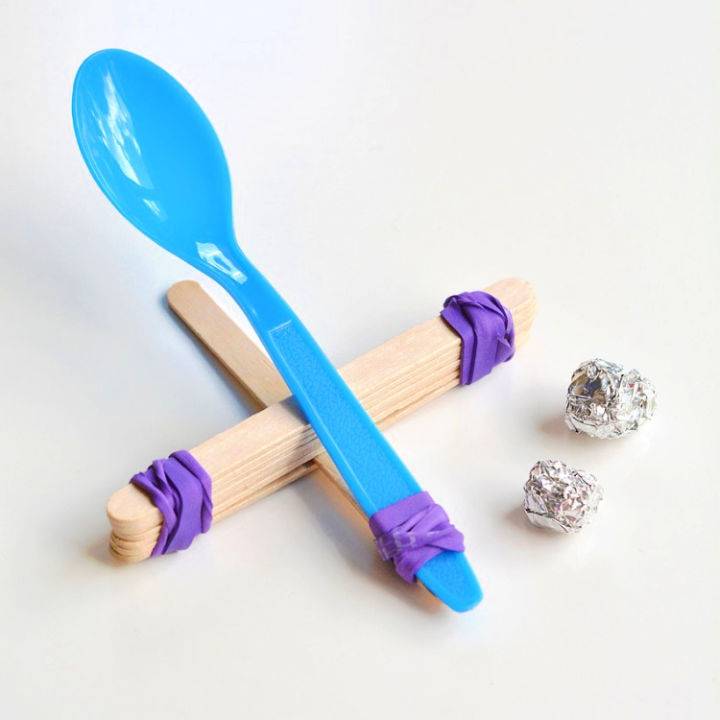
Dive into fun crafts for kids that combine learning with play for memorable experiences. Embarking on an exciting DIY project has never been simpler with this easy-to-follow guide on making a popsicle stick catapult from One Little Project. Perfect for engaging curious minds in a hands-on learning experience, this activity melds fun with educational insights into physics, offering hours of entertainment and experimentation.
Ideal for all ages, it demonstrates the power of levers and motion through playful experimentation. Gather popsicle sticks, rubber bands, and a plastic spoon, and prepare to launch into a memorable science adventure that promises excitement and learning in equal measure.
19. Soft and Squishy Playdough Recipe
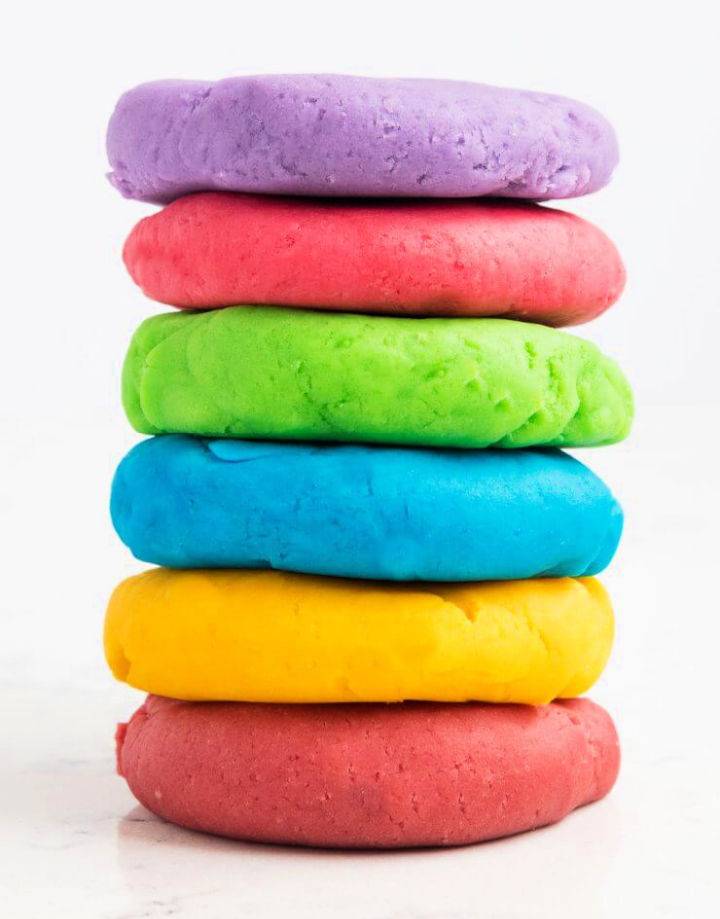
Discover the magic of homemade playdough with this unbeatable recipe from I Heart Naptime. Easy to make in less than 5 minutes and costing under $1, this playdough not only promises endless fun for kids of all ages, but it also stays soft and pliable for months.
Perfect for crafting with cookie cutters, this recipe is a hit for family activities indoors or outdoors. Customize with your favorite colors and even scents for a personalized touch. Dive into this simple guide and keep kids engaged with this soft, squishy, and non-sticky playdough recipe that’s budget-friendly and long-lasting.
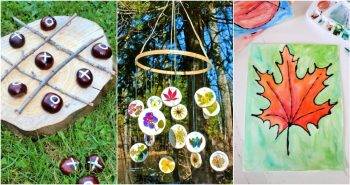
20. Rainbow Popsicle Stick Wreath Craft for 8 Year Old’s
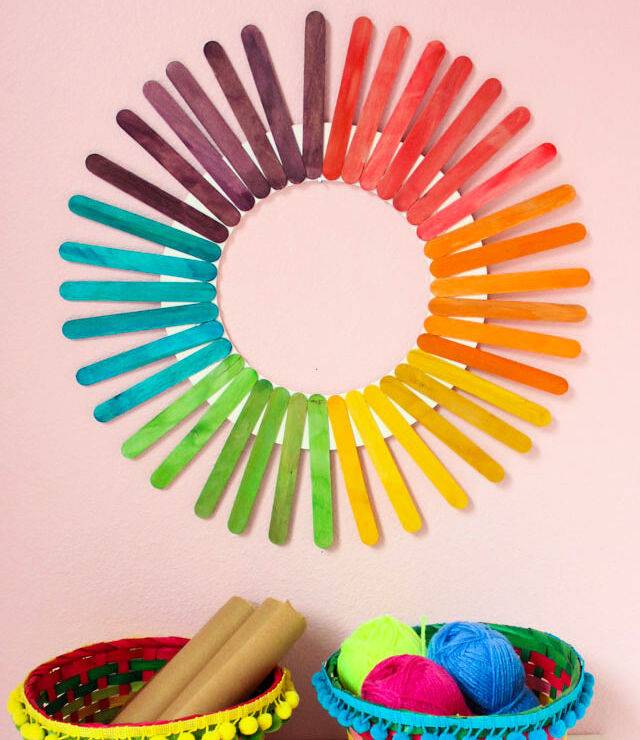
Brighten up any room with a splash of color using this incredibly easy DIY rainbow popsicle stick wreath guide! A perfect craft for adding a joyful touch to your home, this project is straightforward and can be completed in just about 20 minutes. Ideal for St. Patrick’s Day or to keep up year-round for a cheerful vibe.
All you need are rainbow craft sticks, a woodcraft ring, white paint, and a bit of hot glue. Follow simple steps to assemble a stunning rainbow wreath. For a detailed tutorial, visit Design Improvised. Add a unique touch to craft rooms and playrooms or as a thoughtful teacher’s gift!
21. Make Your Own Telescope
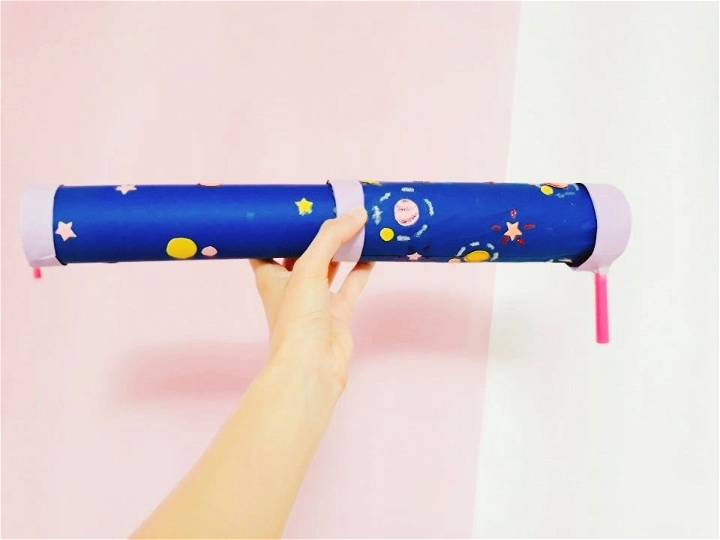
Unlock the secrets of the cosmos or embark on your own backyard adventures with a DIY Homemade Telescope. This easy-to-follow guide on Instructables provides a step-by-step process to make your own telescope using simple materials like magnifying glasses and cardboard tubes. Perfect for star gazing, bird watching, or even playing pirate, this project is not only fun but also introduces you to the basics of optical science. Customize it with your choice of paint or decoration for a personal touch. Start exploring the universe from your backyard today!
22. How to Make a Paper Bunting
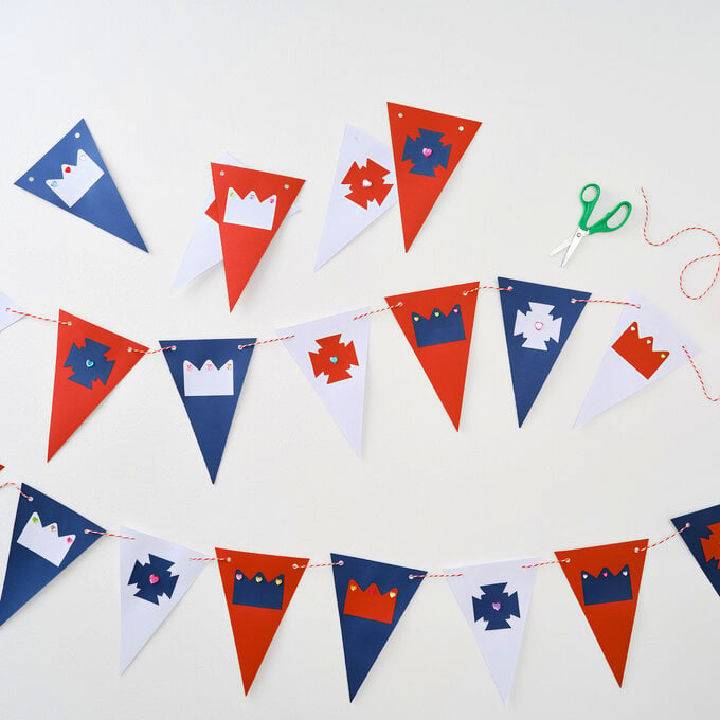
Discover easy crafts for kids for quick and satisfying projects that boost confidence. Elevate your celebration with a touch of handmade charm! Learn to craft beautiful paper bunting in three simple steps, ideal for the Coronation of King Charles III. This fun, engaging project is perfect for involving the kids and adding a personalized flair to your festivities.
Whether decorating in advance or crafting at a street bash, follow Jen Harper’s straightforward guide at Hobbycraft UK for memorable Coronation bunting. Perfect for beginners, dive into DIY decor that’s sure to spotlight any celebration!
23. Make Your Own Binocular
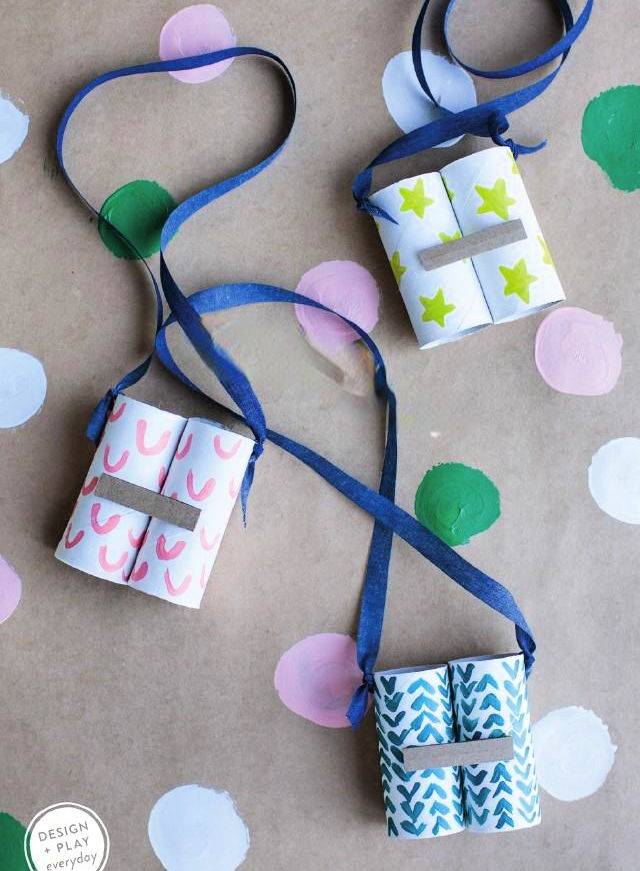
Unleash your child’s imagination with a fun, easy-to-make craft! Introducing the DIY Toilet Paper Roll Binoculars, a creative project perfect for encouraging outdoor exploration. Kids will love assembling their own binoculars using simple materials like toilet paper rolls, craft paint, and ribbon. Ideal for nature walks, bird watching, or just gazing at clouds, this craft turns everyday items into an adventure in your backyard. For a step-by-step guide, visit Rae Ann Kelly’s website. Get crafting and spark your child’s love for the outdoors!
24. Torn Construction Paper Mosaic Mushroom Art
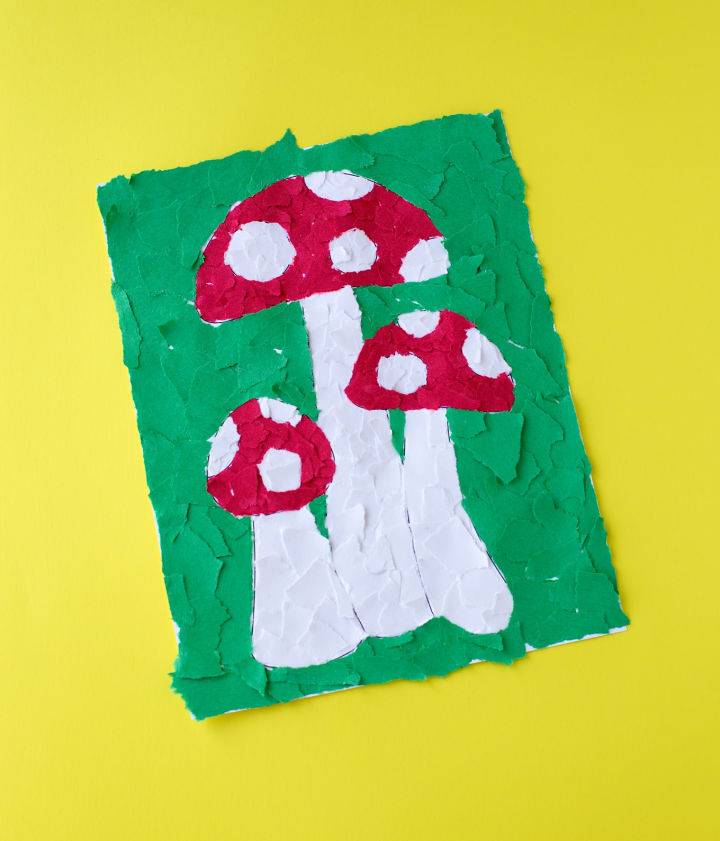
Unlock the magic of creativity with Torn Construction Paper Mosaic Mushroom Art! Engage little ones in fun, strength-building activity by tearing construction paper into vibrant pieces to make unique mushroom mosaics.
Ideal for kids aged 3–7, this project not only enhances the fine motor skills that are crucial for writing but also offers a wonderful opportunity for expressive artistry. With a handy, free printable template, it’s easy to start at home or in the classroom. Let imagination flourish, and enjoy a peaceful crafting session that brings the beauty of nature indoors!
25. How to Make a Clothespin Airplane
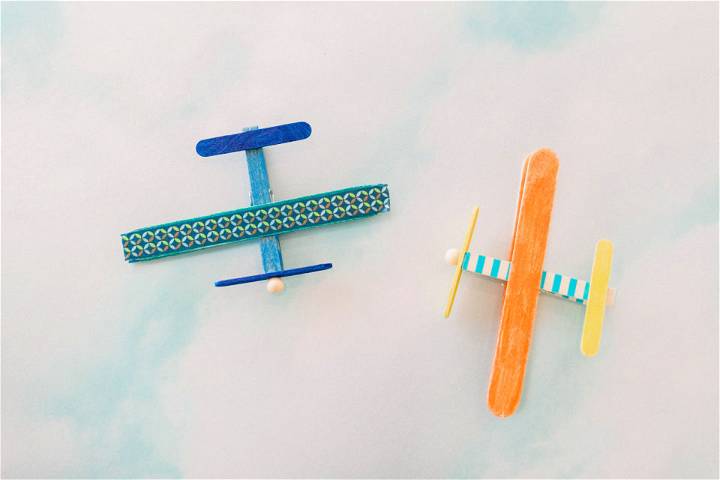
Spend quality time together with easy crafts to do at home, turning rainy days into fun days. Dive into a fun, hands-on project with your kids and make charming clothespin airplanes! All you need are simple craft store finds: a clothespin, wooden bead, popsicle sticks, mini craft sticks, markers or paints, glue, and washi tape for decoration.
This engaging activity not only sparks creativity but also helps in developing fine motor skills as you color, glue, and assemble your little flying wonders. Perfect for playtime or as a personalized addition to any child’s room. For a step-by-step guide, visit Hello Rascal Kids. Get ready to watch your creations take flight!
26. Hand Paper Plate Clock Craft for Kids
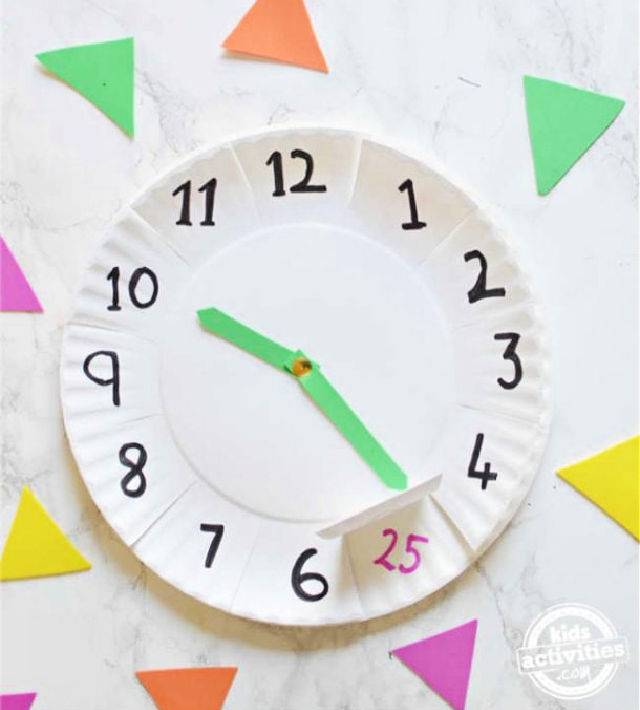
Transform learning into a playful adventure with this DIY Paper Plate Clock Craft! Perfect for kids mastering the art of telling time, this easy craft combines creativity with education, making it a hit for both preschoolers and older kids. With common household items and a splash of fun, your child will enjoy crafting their own clock, setting the stage for hours of learning and practicing time-telling skills. Dive into crafting and learning today with this engaging paper plate clock craft. Find out more and get started here: Kids Activities Blog.
27. Handprint Peacock Salt Dough
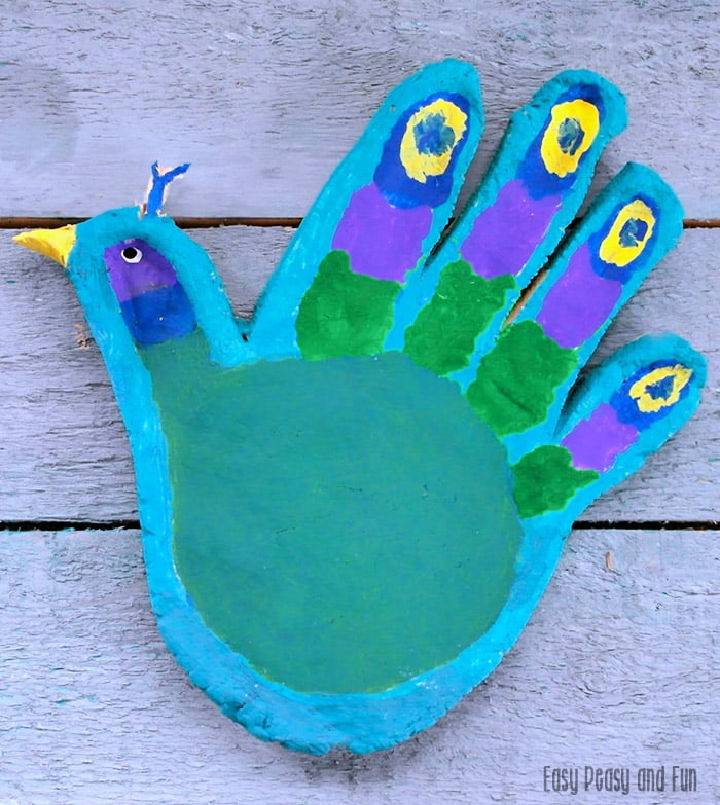
Dive into a colorful crafting adventure with our easy Handprint Peacock Salt Dough Craft for Kids. It’s a fantastic way to bring creativity and fun into your home or classroom using simple materials. This craft is not only enjoyable but also a great way to capture the charm of little hands in a unique and creative way. Follow our step-by-step guide to mix, shape, and paint your salt dough into a beautiful peacock. Perfect for craft enthusiasts of all ages, this project promises fun for everyone involved.
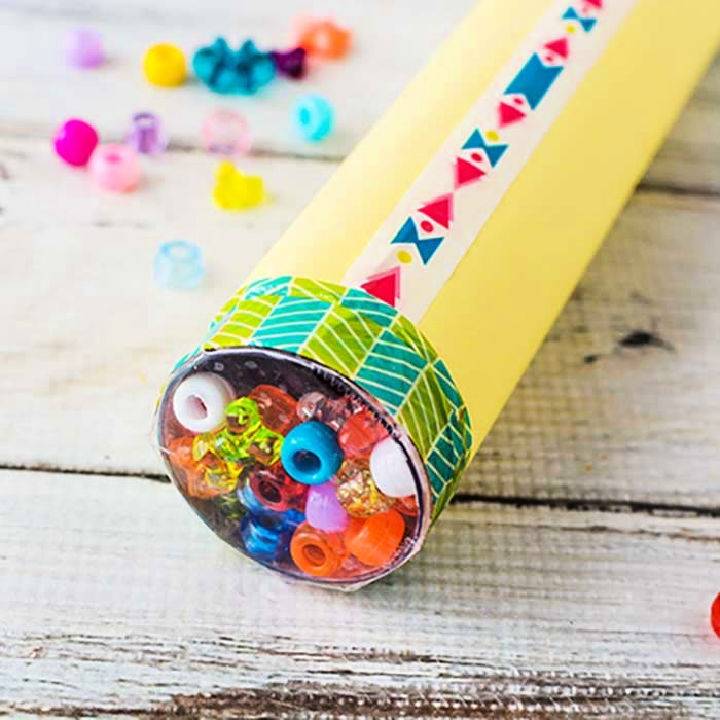
28. Handmade Mini Lid Banjo for Children’s
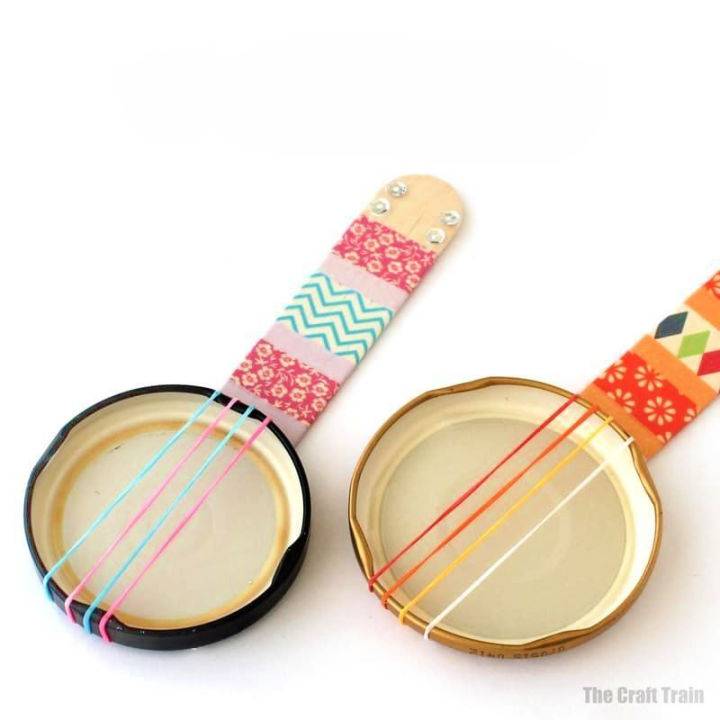
Discover an engaging way to repurpose old jar lids into charming Mini Lid Banjos. Perfect for crafty kids, this project transforms simple materials into a quirky musical toy. All you need are jumbo craft sticks, loom bands, washi tape, and a few more household items.
Follow easy steps to assemble your banjo, complete with loom band strings that produce a gentle sound. Get creative with decorations, making each banjo uniquely yours. This quick and delightful craft promises fun-filled music making for children, fostering creativity and repurposing skills.
29. Useful Coffee Filter Dancers
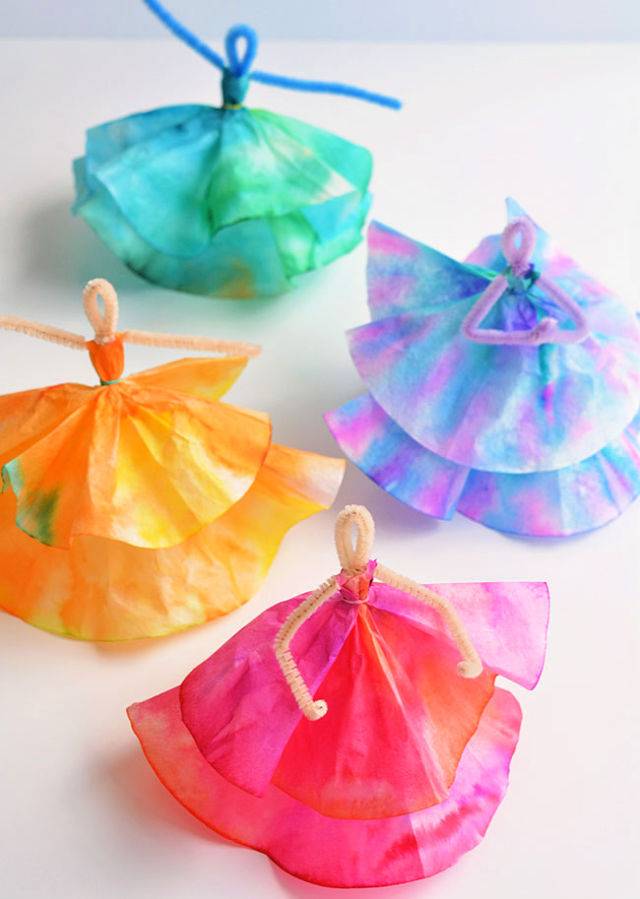
Encourage young minds with simple crafts for kids, promoting creativity with minimal materials. Discover how to craft enchanting Coffee Filter Dancers with a simple visit to One Little Project. Using everyday items like coffee filters, washable markers, and pipe cleaners, this activity is perfect for engaging little ones in a creative and colorful art project.
This guide provides step-by-step instructions, ensuring a fun and mess-free crafting experience. Ideal for all who cherish making beautiful crafts from simple materials, see how a few markers can bring life to these charming dancers.
30. Indoor Pom Pom Shooter Activities for Kids
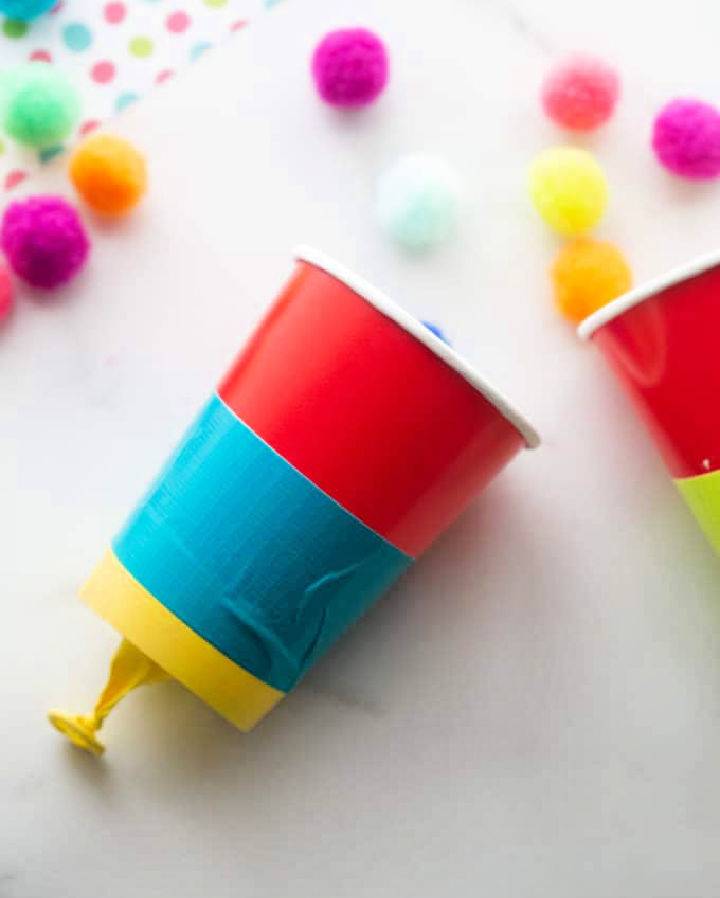
Delve into a universe of indoor entertainment with a simple, engaging craft: building your own pom pom shooters! Ideal for rainy days or any moment requiring a burst of fun, these DIY launchers are perfect for engaging little ones in hands-on creativity. By utilizing common household items such as toilet paper rolls, balloons, and a dash of craft supplies, you’ll bring to life colorful pom pom shooters that promise endless amusement.
Curious how to craft these playful gadgets? Explore the guided steps and transform ordinary materials into sources of joy and laughter at Little Bins for Little Hands. Perfect for indoor play, this activity not only entertains but subtly introduces kids to basic physics principles, making it a doubly valuable addition to your repertoire of fun, educational crafts.
31. Creative Popsicle Stick Ferris Wheel for 11 Year Old’s
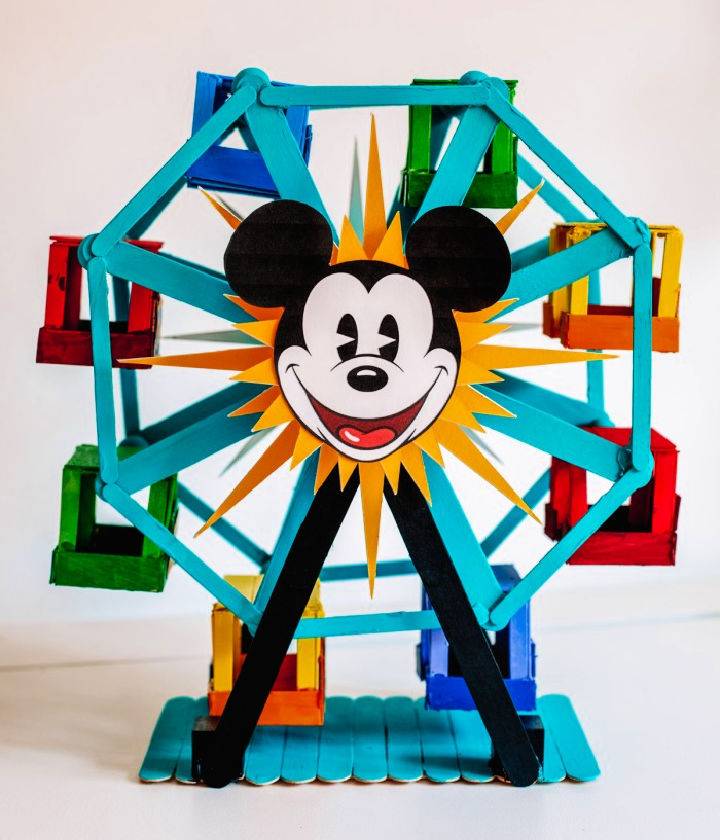
Discover how to transform everyday popsicle sticks into a dynamic and colorful Popsicle Stick Ferris Wheel, with the option to style it after the iconic Pixar Pal-A-Round at Disney California Adventure! With a mix of jumbo and regular popsicle sticks, wooden dowels, and beads, this step-by-step guide ensures a fun, engaging project. Perfect for builders of all ages, this DIY craft not only inspires creativity but also results in a working Ferris wheel, bringing a slice of Disneyland magic into your home.
32. Earth Suncatcher Arts and Crafts
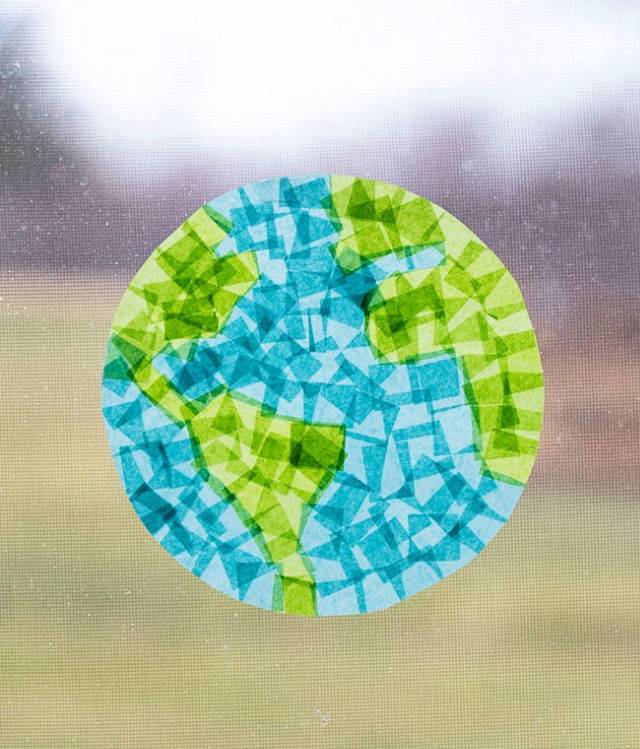
Discover a delightful way to celebrate Earth Day with this engaging Earth Suncatcher Craft, ideal for sparking creativity in kids while emphasizing the beauty of our planet. Using easily sourced or recycled materials, this craft is not only an artistic pursuit but also a gentle nod towards sustainability. Gather some tissue paper, recycled plastic or clear contact paper, and scissors—your key components for this eco-friendly project.
The process is simplified with a free printable template available, making it approachable for all. For the full guide and additional fun recycled crafts, visit The Best Ideas for Kids. This craft not only decorates your space with colorful suncatchers but also opens up conversations about protecting our Earth, making it a perfect activity for Earth Day or any day you’re feeling crafty and conscientious.
33. Fingerprint Flower Pot Craft Ideas
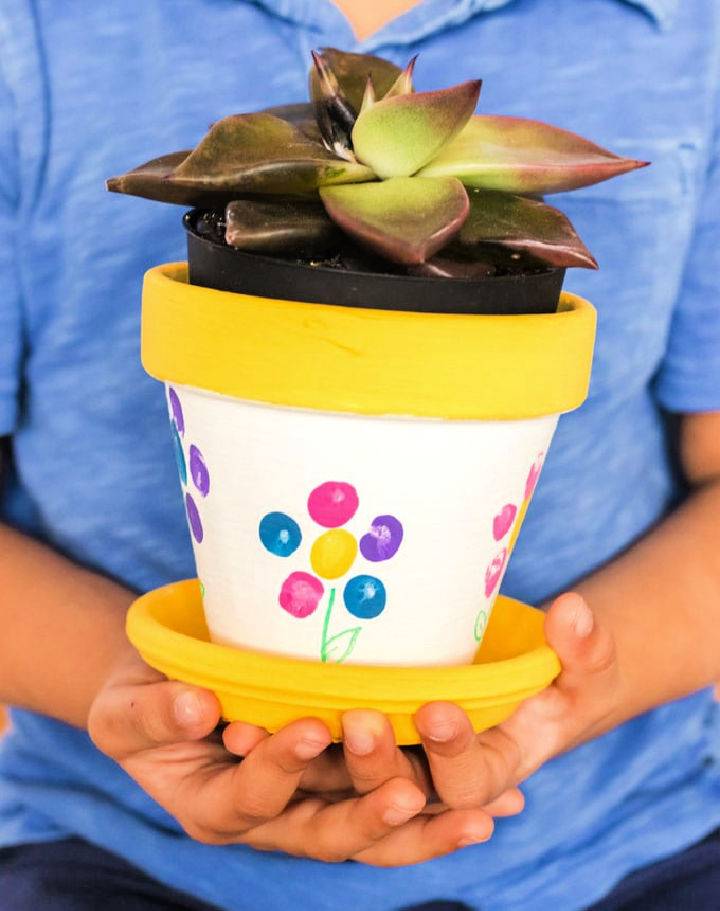
Unleash your creativity and make cherished memories with your little ones by crafting these delightful Fingerprint Flower Pots. Perfect for nurturing a touch of spring indoors, these pots make fabulous gifts for Mother’s Day or birthdays. Dive into a simple yet engaging craft that turns into a lively project for kids aged 3-10, blending art and possibly a bit of science if you choose to plant seeds and observe their growth.
With accessible materials and a sprinkle of imagination, you’ll transform ordinary terra cotta pots into vibrant keepsakes. The step-by-step guide ensures a fun experience with beautiful end results – an inspiring way to add a personal touch to your green spaces!
34. Paper Mask Craft to Do at Home
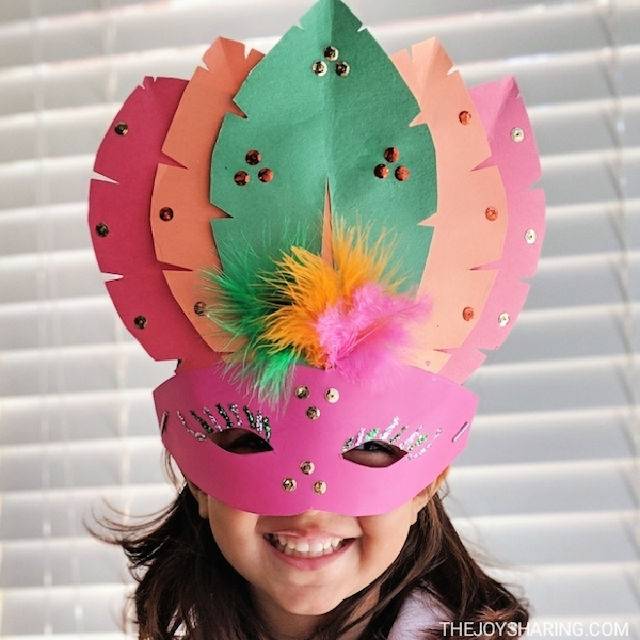
Keep little hands busy with crafts for kids to do at home, ideal for afternoons full of creativity. Bring creativity and fun to your child’s New Year’s Eve celebration with a handmade DIY paper mask.
This straightforward craft is perfect for kids eager to craft their festive attire. Find step-by-step instructions and make this New Year’s Eve memorable. For more creative ideas, visit The Joy Sharing. Dive into crafting and celebrate with style!
35. Paper Spinner for Elementary Students
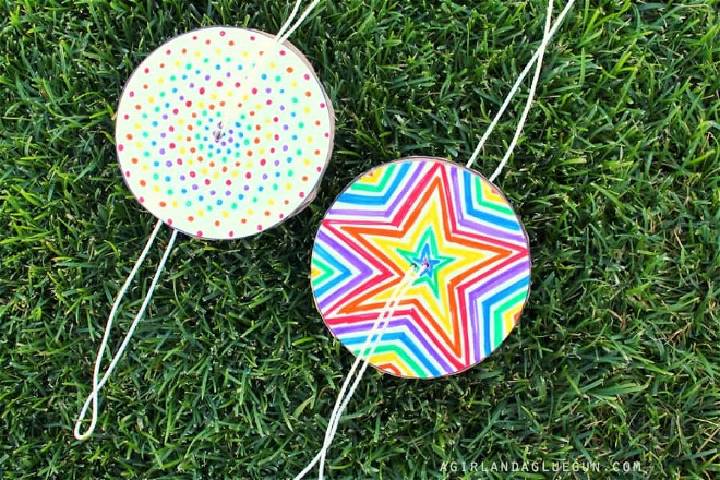
Looking for a fun and easy craft that offers endless entertainment? Dive into making your own DIY Paper Spinner with this helpful guide from Make and Takes. With simple supplies like twine, cardboard, and markers, you can make a colorful spinner that hums as it twists and turns. Perfect for summer play, this craft is ideal for both kids and adults. Follow step-by-step instructions to assemble your spinner and get ready for hours of enjoyment. Let’s craft and play today!
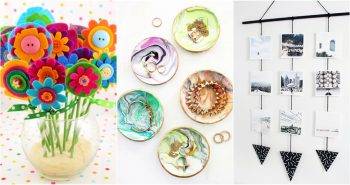
36. DIY Art Tree With Multi Colored Button
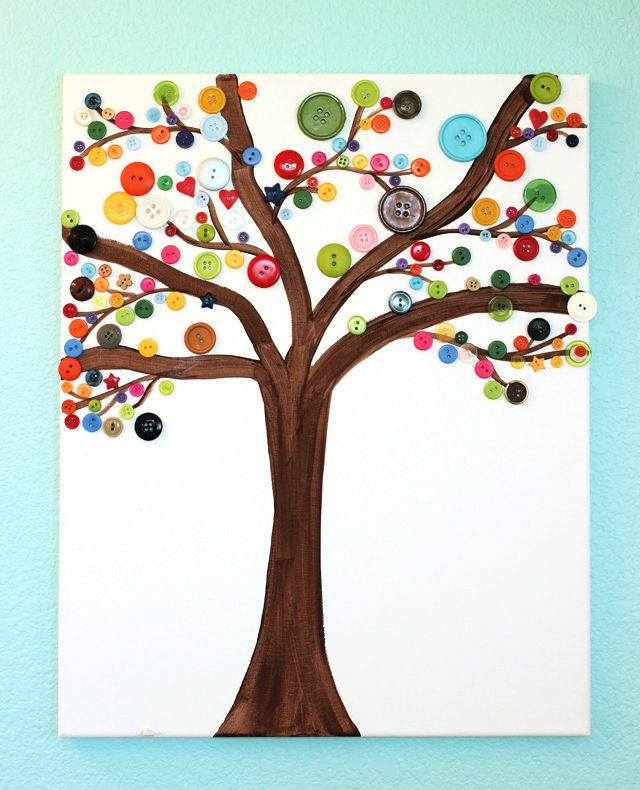
Unleash your child’s creativity with a captivating Button Art Tree craft! Ideal for kids of all ages, this craft emphasizes fun while fostering sorting skills and artistic expression. Starting with a simple painted tree on canvas, children can explore their imagination by decorating it with multi-colored buttons.
The project emphasizes the use of Tacky Glue for easy button attachment, allowing for a mix of shapes, sizes, and colors. This hands-on activity not only cultivates artistic flair but also introduces children to basic crafting techniques. For more engaging and straightforward craft ideas, feel encouraged to visit Simply Designing. Let your kids revel in the joy of making their unique button art masterpiece today!
37. Cupcake Liner Flowers Craft for 6 Year Old’s
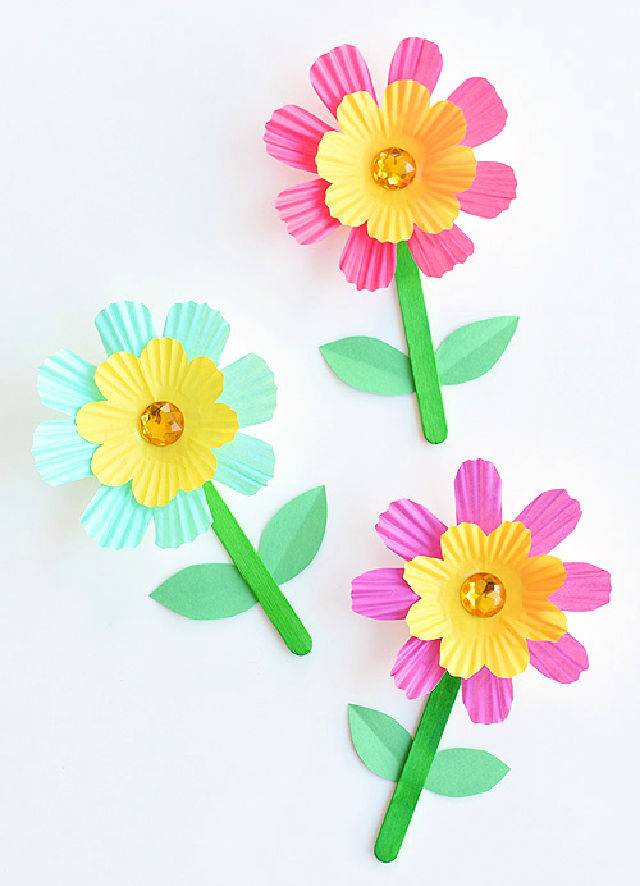
Unleash your creativity and brighten up your space with these adorable and vibrant cupcake liner flowers! Perfect for brightening any room or adding a personal touch to gifts and cards, these flowers are not only easy to make but also a fun activity that kids can enjoy too.
All you need is a few simple supplies like cupcake liners, popsicle sticks, and a bit of imagination. For a step-by-step guide on how to make these lovely blooms, visit One Little Project. Get started and watch your floral creations come to life, adding a pop of color to your world!
38. Homemade Sidewalk Chalk Paint Recipe
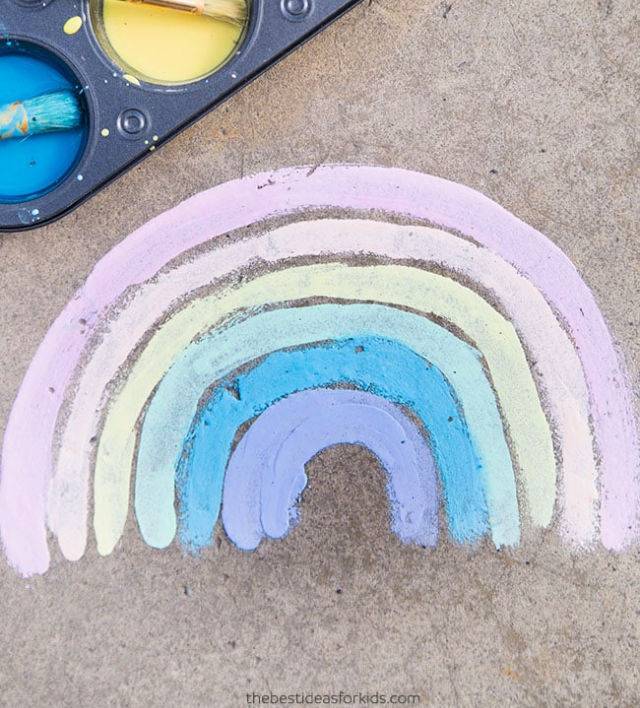
Unleash your inner artist with this simple yet exciting sidewalk chalk paint recipe. Perfect for kids and families, this DIY project transforms ordinary sidewalks into vibrant masterpieces. Mix cornstarch, water, and crumbled sidewalk chalk to make this washable paint. Ideal for drawing, writing, or even making a colorful obstacle course outside. It’s a wonderful way to repurpose leftover chalk bits, ensuring easy cleanup and endless outdoor fun. Get ready to add a splash of color to your day!
39. Cute Polar Bear Paper Bag Puppet
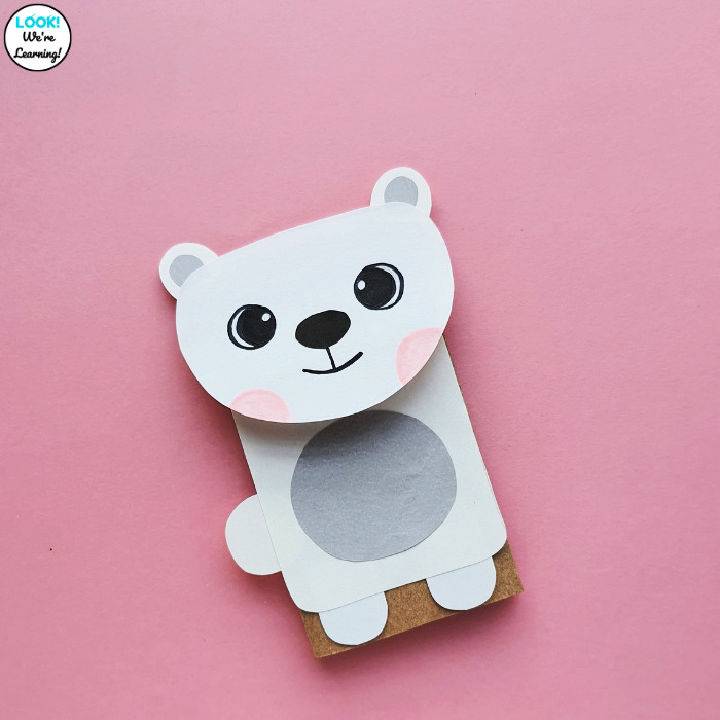
Engage in fun activities for kids that promote growth, learning, and lots of smiles. Unleash the joy of crafting with your little ones this winter season! Introduce them to a charming and effortless project: the Easy Polar Bear Paper Bag Puppet. Perfect for preschool and kindergarten, this craft requires just a few common supplies and can be completed quickly.
Ideal for an Arctic or winter-themed lesson, it also provides a wonderful opportunity for creative expression. Follow the simple steps to assemble this delightful polar bear puppet, then explore more snowy craft ideas for endless fun!
40. Easy Paper Pinwheel Craft with Printable Template
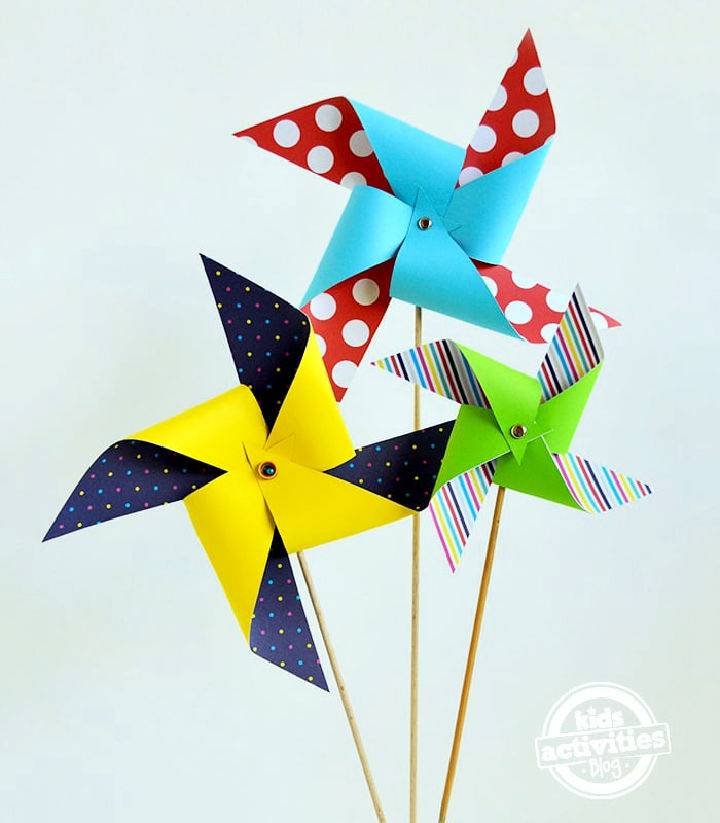
Dive into summer fun with this engaging Giant Paper Pinwheel Craft, perfect for kids of all ages! With a handy printable template and common craft supplies, you can make stunning homemade pinwheels that add a pop of color to any space.
This project not only sparks creativity but also brings the joy of summer into your home or classroom. Follow the simple steps to craft both giant and palm-sized pinwheels, letting the breeze bring your creations to life. Start crafting today and watch as your colorful pinwheels spin in the summer wind!
Conclusion:
In conclusion, our exploration of 40 fun and easy crafts for kids has shown the endless possibilities for creativity, learning, and bonding through simple craft projects. By choosing the right project, gathering materials, and setting up a designated crafting area, you can provide your children with hours of entertainment and educational development.
Remember to incorporate cleanup into the process, turning it into an extension of the activity that can teach responsibility and organization. Whether it’s making a masterpiece from recycled materials or painting a family portrait, these fun art and craft ideas for kids are not just activities; they’re stepping stones to childhood development and cherished family memories. So, grab your supplies and get ready to make some creative magic with your little ones!
Related DIY Ideas to Try:
 25 Fun Crafts to Do When Bored: Fun Things to Make
 25 Fun Nature Crafts and Art Ideas for Kids and Adults
 Kindergarten Crafts: 30 Fun Art Projects and Activities
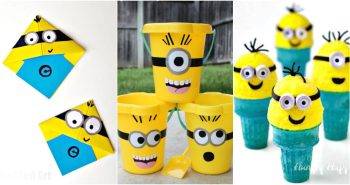 Minion Crafts: 25 Minion Art and Craft Ideas for Kids
 30 Crafts for Teens (Fun Arts and Craft Ideas for Tweens)
 25 Flower Crafts for Kids | Flower Art and Craft Ideas
 60 Easy Rainbow Crafts for Kids to Do Fun Projects
 35 Fun Bird Crafts for Kids, Preschoolers and Toddlers
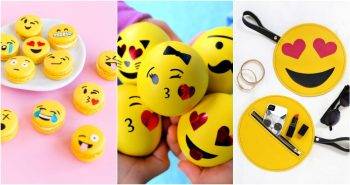 25 Fun Emoji Crafts to DIY for Kids and Adults
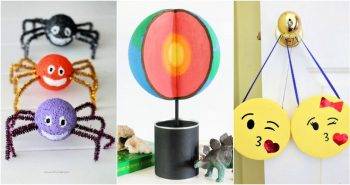 20 Styrofoam Crafts – Fun Crafts with Foam Balls
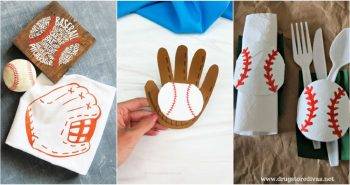 15 Baseball Crafts for Kids (Art and Craft Ideas)
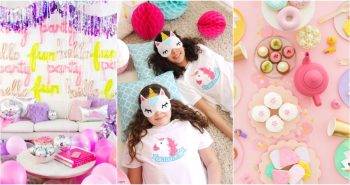 20 Sleepover Ideas for Kids (Fun Things to Do)